

How often do you alter and bleed the brake fluid on your bike? If you haven’t repaired your brakes in the past year, you are outstanding and should adjust them even if you haven’t been riding them. Racers should bleed the brakes every 20 hours and sporting riders every 40 hours of riding.
Fresh brake fluid is radiant in color; like gasoline, it becomes darker when it starts to go wrong. Off-road bikes usually use DOT 3, 4, or 5.1-grade brake fluid. Use what your motorcycle is, she’d go for, but generally, the higher the number, the better the value and the higher the boiling point.
What Should be Change Interval for Motorcycle Brake Fluid?
The suitable change duration for brake fluid in a motorcycle is two years. It’s generally because the brake fluid absorbs water, and over time, the water capacity in the brake fluid will start eroding the metal ingredients related to the braking system.
Furthermore, this 2-year duration is not for brake fluid top-up. Instead, the top-up should be done whenever expected by testing the brake fluid levels during every motorcycle repair time.
Changing the motorcycle brake fluid means sifting the whole brake fluid prevailing in the motorcycle and refilling it with the new fluid.
While the actual interval period to change the brake fluid in your bike might fluctuate depending on the riding, bike model, usage, and quality of braking fluid, the general thumb rule is to renovate the brake fluid in your motorcycle every two years.
Why Should Brake Fluid be Changed?

The first and foremost reason brake fluid must be altered in the motorcycle is that brake fluid absorbs water. These are hygroscopic. As a result, many metal elements related to the braking system will start eroding once the brake fluid starts consuming the vapor from the air.
That’s why the brake fluid must be altered every two years to deter too much water from penetrating the brake fluid in the motorcycle.
Second, the quality of the brake fluid deteriorates over time. The continual heat developed in the braking system, mainly due to anti-lock braking (ABS), will affect the brake fluid.
The heat produced will slowly break down the fluid, and the brake fluid factors change over some time. Sometimes, the characteristics change is so severe in the brake fluid that it won’t pertain to brakes.
Third, as the brake fluid intervals, more polluted specks enter the brake fluid. As the contamination boosts, the performance of the brake fluid declines. As a result, the braking performance deteriorates over time as well.
For these goals, the motorcycle brake fluid must be altered regularly every once in two years period.
1. Necessary Equipment
Here’s what you require
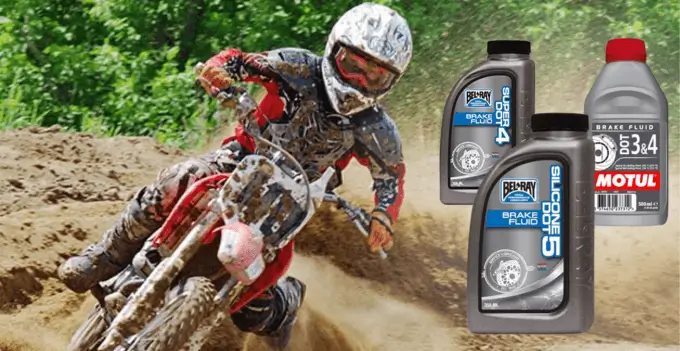
2. Brake fluid
Brake dot four or Brake dot 5.1, according to the manufacturer’s suggestions for your bike, and X-treme Brake Fluid for competition motorcycles.
3. The environmental rug
To perfectly secure all floors from fluid smudges.
4. Brake Cleaner
Decreases brakes and all automatic portions.
Other Accessories Needed
- A brake bleeding set
- Cloths to save your bike
- A toolbox with a Phillips screwdriver and a mixture of a wrench
- A pair of surgical gloves
How Much Does A Motorbike Brake Fluid Change Cost?
Suppose you do it yourself and have suitable devices like a brake fluid change taxes as much as a new bottle of fluid, which can be as inexpensive as £5. Ensure you’ve tested your directory to find out what the manufacturer suggests. It isn’t something you want to cut nooks with. A bleed kit usually goes for around £15.
How To Change Your Bike’s Brake Fluid In 10 Steps?
1. Time for a Change?
Look in your workshop manual for the manufacturer’s proposed duration for fluid change. Finally, park the bike on the stands so it is straight and level.
2. Protect Your Paint
Brake fluid is very adverse to colored surfaces, so equip the area around the tank and handlebars for any possible spillage. Cover the tank and headstock area with an old towel, sheet, or bike cover. Always have a few papers of workshop paper towels at hand ready to instantly mop up any dots that discover their way onto exposed areas.
3. Open the Reservoir
Wear defensive workshop gloves from this point on. Next, eliminate the reservoir top; occasionally, it is conserved with a screw and placing bracket. When eliminating the lid, do it gradually, ensuring the diaphragm isn’t going to drop off. Sometimes it will stay in the reservoir; if this is the case, gently remove it and have a paper towel to hand to catch any dots.
4. Tweak Your Nipple
Recognize the size of the spanner required to fit the bleed nipple. It’s usually between 8mm-10mm. First, eliminate the rubber grommet preserving the nipple. Ideally, spot a ring spanner on the nipple so it can be untied a few degrees without slamming anything. Next, fit the tube from the bleed kit to the unprotected nipple.
5. Crack and Squeeze
Break the nipple carefully while applying pressure to the brake lever. Next, pull the nipple and let go of the lever. Repeat this until you see a clear cascade of bubble-free fluid in the transparent portion of the tube, then pump the fluid through, halting to fasten the nipple every time.
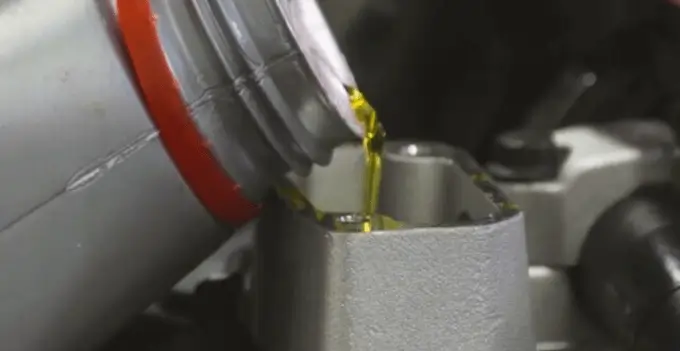
6. Top Up With Fresh Fluid
Put in fresh brake fluid as the level inside the master shaft reduces with each lever pump. Occasionally the procedure can be sped up by having your brake lever span modified to its maximum. However, don’t stride the lever too rapidly; it could pop the bleed pipe off and spit fluid around.
7. Watch For a Color Change
Fresh fluid looks brighter than old fluid, so when you see a color change in the bleed kit’s transparent pipe, fasten the nipple up, check the master cylinder level is okay, and dump the lever. Most bikes have dual discs on the front, so the contrary caliper will require the same method to flush out the old fluid. An additional pair of hands can assist here.
8. Check For Air
With both calipers redden with new brake fluid, grip the lever one final time, break the nipple, and ensure no air bulges in the tube, then re-tighten. Repeat for both calipers. The brake lever should be firm with no sponginess. Top up the reservoir to the exact level. Refit the lid, making sure the diaphragm is placed correctly.
9. Repeat at The Rear
The same method can pertain to the rear brake. Again, use the bleed kit and pump out the old fluid while strengthening fresh. It’s worth noting that many rear calipers are suited with two bleed nipples. If this is the case, use the nipple in the tallest position, as this will enable you to keep air out of the system.
10. Give It a Final Once-over
With all three calipers flushed, front and rear fluid reservoirs are replenished to their upper levels. Then go around the bike and visually examine the situation of other portions of the braking system, such as pads, hose routing, banjo bolts, and any hose-retaining clips, as well as look out for leaks.
What Type of Brake Fluid Do I Need?
DOT 3, DOT 4, DOT 5, DOT 5.1? Which one should you use? The significant distinction between these brake fluids is their boiling degrees. Motorcycle brakes function at high temperatures, and you want to reduce the danger of boiling the brake fluid as much as possible.
Usually, riders who mandate high execution from their motorcycles will use a brake fluid with a higher boiling point. Those who race, or nudge their boundaries during a trail day, will use their brakes heavily, resulting in more heat. Still, the high boiling point is not as much of a factor for a popular or cautious street rider.
Here’s a quick reference of boiling degrees for all four fluids.
| Dry Boiling Point | Wet Boiling Point | |
| DOT 3 | 205 °C (401 °F) | 140 °C (284 °F) |
| DOT 4 | 230 °C (446 °F) | 155 °C (311 °F) |
| DOT 5 | 260 °C (500 °F) | 180 °C (356 °F) |
| DOT 5.1 | 260 °C (500 °F) | 180 °C (356 °F) |
You can recognize that the boiling point for 5 and 5.1 are the same. What’s the variation? DOT 5 is a silicone-based fluid, while DOT 5.1, and all the others, are glycol-based. People weren’t pleased with the silicone base fluid because it was sensitive to building more moisture in the lines. Glycol-based fluids are hygroscopic water-consuming, so DOT 5.1 was formulated.
In my viewpoint, based on the exploration I’ve done, use either DOT 4 or DOT 5.1. However, I keep it compatible and always use DOT 4 as I don’t want the high-performance capacities of DOT 5.1.
A Few Precautions to Take
Don’t use DOT 3 brake fluid in your motorcycle. The boiling degree is too short, which could result in brake loss.
Never mix DOT 5 with any other brake fluid. It is silicone based, while all other brake fluids are glycol-based.
Remove used brake fluid appropriately based on your town or county’s trash and removal constraints. Do not toss it down the trench or on the ground. That isn’t very good.
Where to Discard Used Brake Fluid?
Brake fluid is highly corrosive and explosive and should be removed with care. However, most waste collectors authorize you to stir the brake fluid with used motor oil, which can be recycled together. So most areas that approve used oil should also ratify used brake fluid. Some auto parts stores may also accept used brake fluid to be recycled.
Conclusion
Bleeding your motorcycle brakes is usually a susceptible job, but sometimes you can jog into a problem. I know I have! If you cannot bleed your brakes, there may be nothing false, and it might just be an airlock in the system.
The standard procedure of bleeding brakes will usually work, but to reduce more air from the system and make the job easier, investing in the equipment to overturn bleed your brakes will give you better outcomes. If you want to learn more about dirt bikes, keep visiting dirtbikecoach.com. In case of any queries, feel free to contact us.
Happy Riding !!!


")
")

