
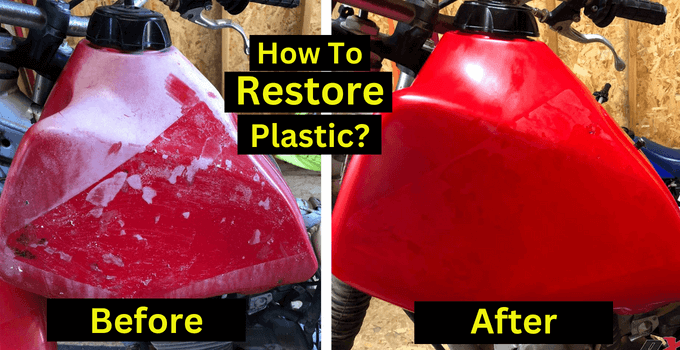
You have possibly seen that the plastics on your dirt bike are beginning to look mild and aged. So how to make dirt bike plastics look recent again with the commodities you have access to at home? This is a common issue for many bikers, and it can be frustrating to strive to discover the mean of making them look new again. Luckily, you can use a lot of techniques that will never expect any unique mastery or costly shares. In this blog post, we will discuss these techniques and share some incredible tips for renovating your plastics in no time!
Dirt Bike Plastic Restore Tools List
So here is a list of gadgets that I used during the process. I found people had differing methods for doing this, but I used a blend of concepts along with the bit of knowledge I have from prior work I have done.
So the tools are:
- Sponge with an attached scourer on the behind
- Hot water and dish soap for preliminary wash
- Stanley knife blade
- Moist and Dry Sandpaper (120g -1200g)
- Buffer pad and plug or buffer machine
- Polish Compound
How to Restore Dirt Bike Plastics To Give A New Look
What are you waiting for if you’re gazing to make your dirt bike plastics look new again? These step-by-step teachings will take care of any difficulties in a snap!
Step#1: Make Sure Your Plastics Are Clean
Drain them with warm water and dish soap to eliminate dirt, mud, or grease from the surface. Use a scrub brush if required or an old toothbrush. Rinse off all soapy water with a sock or outside spout.

Step#2: Clean The Stains Away
If any tough stains, particularly oil, are left behind, try utilizing baking soda as an abrasive to relieve them. Brush in circular motions until the smudge has been eliminated. If vinegar is your preferred method, add it to your baking soda to get rid of tints.
Step#3: Remove The Rust

If rust has been the problem in getting a fresh-looking dirt bike, try utilizing steel fiber and WD40 or rubbing alcohol as a cleaning agent. Spray or apply these materials onto the surface with a rag, then brush away for the best results. If you need more help, call a professional.
Step#4: Soak The Plastics In Water & Dish Soap
Fill both pails with warm water and dish soap. Drop your dirt bike plastics in the soapy solution, and let them soak for a few minutes to loosen any glop that might result in a smell or ugly smudges. Rinse thoroughly after soaking.
Step#5: Dry Plastics Out
After you’ve finalized the process of soaking your dirt bike plastics in dish soap, wash them out completely with warm water and dry them off. You can place a fan near the items to speed up drying time or use an air compressor to blow it around if your plastic is too wet after washing it.
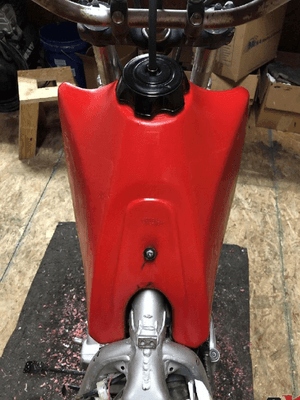
Step#6: Give Plastics A Fresh Coat Of Paint
Now that your dirt bike plastics are neat and dry, please give them a fresh coat of color to freshen up the color and make them look recent! You can use sprinkled paint if you don’t want to do any portrayal by hand or apply some glue for a quick fix.
Step#7: Enjoy Your New Dirt Bike Plastics!

Now that you’ve known how to make dirt bike plastics look new, it’s time for the pleasure part! Relish your recently cleared and fresh paint job on your motorcycle or ATV by riding off into the dusk.
Do you know how to clean dirt bike air filter?
Tips & Maintenance Guide for Dirt Bike Plastics

Tip1: Wash off all the dirt and mud on your plastics with a favorable soap. Wash thoroughly to get rid of any extra soap residue
Tip2: Mix up some dishwasher detergent, water, and white vinegar in balanced parts: Put this into a vacant spray bottle.
Tip3: Spray liberally over the bike’s plastic textures that are not automated, such as around controls or fuel tank areas.
Tip4: Let sit for 15 minutes before washing with clear water, only utilizing a high-pressure sock if accessible.
Tip5: Drip dry out of direct sunshine. Do not use warmth! Plastic will curve and bang from severe heat sources like radiators or cook stoves. Air drying is best, but it can take many hours.
Tip6: Use a microfiber cloth to coat and eliminate water droplets from polished plastics such as switches, mirrors, or headlight lenses.
Tip7: Put it back together and ride! You might glance that your bike is glossier than before. This is because the dishwasher detergent raises dirt grains off of plastic surfaces, while the vinegar enables removing oil or dirt buildup on other areas of the bike.
Tip8: For extra safety against UV rays that can result in fading over time on clear plastic grounds like levers, use 303 Protectant for Plastics which is accessible in most auto parts stores. This will also assist deter breaking down due to heat disclosure!
We hope these pointers will assist your next dirt bike plastics repair project.
Conclusion
There are various paths to making dirt bike plastics look new. But what method is promising? In this article, we wrap up some of the unique techniques for restoring your plastic’s essential shine and brightness, so they don’t have to be renovated again anytime soon.
Follow our guidance about cleaning with soap or water before applying the correct type of polish and sealant that works adequately for your particular model. You may be shocked at how much better it glances when you take care of it! If this sounds difficult, don’t worry. We’re here to help! Only let us know in the comment below!


![Dirt Bike Braking Tips And Techniques [Stop Dirt Bike Safely]](https://dirtbikecoach.com/wp-content/uploads/2022/08/Dirt-Bike-Braking-Tips-211x150.png "Dirt Bike Braking Tips And Techniques [Stop Dirt Bike Safely]")
")

