
If you’re a dirt bike fan, you know the importance of an adequately adjusted carburetor. Adjusting the carburetor maintains optimal engine performance. The carburetor plays a vital role in regulating the fuel-air mixture that powers the engine.
Over time, altitude, temperature, and wear can affect the carburetor’s settings. So requires adjustments to maintain peak performance. Whether you’re experiencing poor throttle response or hesitation or want to fine-tune your dirt bike’s performance, learning how to adjust the carburetor is valuable for any dirt bike enthusiast.
In this article, we will walk you through the process of carburetor adjustment step by step. Empowering you to optimize your dirt bike’s fuel efficiency, power delivery, and overall riding experience.
Ultimately, an incorrectly adjusted carburetor can lead to engine damage. Therefore, here we’ll show you how to adjust a carburetor on a dirt bike. Let’s get started!
What Is a Carburetor?
A carburetor is a device used in the fuel system of a dirt bike to mix the correct amount of fuel with incoming air. It is crucial in delivering the proper fuel-air mixture for efficient combustion and engine performance. In short, it controls the speed and the power of the engine.
The carburetor comprises several key components, including a throttle valve, venturi, float chamber, jets, and needle valve. The carburetor mixes the fuel with the oxygen from the air in a chamber and sends it to the engine so that the engine may work efficiently and smoothly.
Three Carburetor Systems
A choke system is a mechanism used to enrich the air-fuel mixture when the engine is cold. It is necessary because a cold engine does not vaporize fuel as easily as a warm engine. So a richer mixture is needed to ensure the engine starts and runs smoothly.
The choke plate is manually or automatically controlled. It gradually disengages as the engine reaches its operating temperature.
The idle circuit is a fuel-delivery system within a carburetor that provides fuel during idle or low engine speed conditions. It consists of an idle jet and idle air screw, which control the fuel and air mixture for stable idling up to approximately 1/8 throttle. Proper adjustment of these components ensures smooth idle operation.
The fuel enters the idle tube from the float bowl towards the needle jet. The engine vacuum encompasses the fuel to the pilot jet. There, fuel mixing is done in the idle air screw.
The main circuit is the third fuel-delivery system in a carburetor. It’s responsible for fueling the engine under normal load. The main jet is a small hole that restricts the flow of fuel. The venturi is a narrow carburetor section that creates a vacuum that draws the fuel into the engine. The air bleed is a small hole that allows air to enter the main circuit. The amount of air that enters the main circuit determines the richness of the mixture.
The main circuit is activated when the throttle is opened. As the throttle is opened, the venturi vacuum increases, drawing more fuel from the main jet. The air bleed also opens as the throttle is opened, which allows more air to enter the main circuit. This results in a richer mixture necessary for the engine to run smoothly under normal load.
Do You Know?
For complete combustion of the fuel, the mixture must be almost 15 parts air to 1 part fuel, while for best power, a mixture of 12.5 parts air to 1 part fuel is needed.
Carburetor Parts Aren’t Cheap
Indeed, carburetor parts can be relatively expensive, especially if you need to replace or repair specific components. The cost of carburetor parts may vary depending on the model of the dirt bike, the specific part needed, and where you purchase it from. Factors contributing to the cost include:
- The complexity of the carburetor design.
- The quality of materials used.
- The brand reputation.
However, it’s worth noting that not all carburetor parts need frequent replacement. With proper maintenance and care, many carburetor components can last significantly. The dirt bike carburetor diagram would be perfect for understanding the different parts and their functions. Here’re the parts which make up a carburetor system:
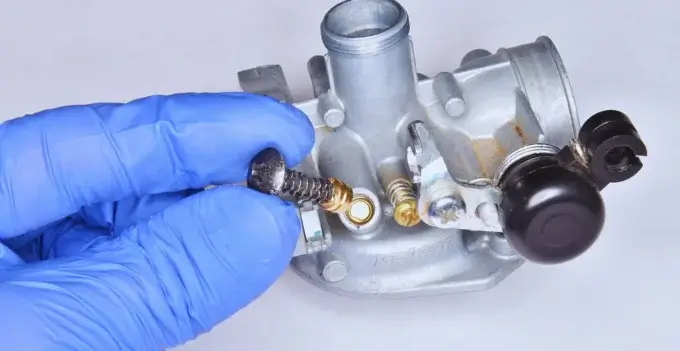
1. Pilot Screw – fine idle adjustment
The pilot screw is located on the bottom or side. It’s easily accessible for adjustment. The pilot screw controls the fuel delivered to the engine at idle or low RPMs. By turning the pilot screw clockwise or counterclockwise, the rider can adjust the fuel mixture for optimal idle performance.
When the pilot screw is turned in (clockwise), it reduces the air flowing into the idle circuit, creating a richer fuel mixture. Turning the screw out (counterclockwise) increases the airflow, resulting in a leaner fuel mixture. The pilot screw allows for fine-tuning idle speed and fuel mixture.
Adjust the pilot screw, warm the engine, and set the idle speed to the manufacturer’s recommended specifications. Then, using a screwdriver, turn the pilot screw in small increments (usually 1/4 turn at a time) and observe the effect on the idle speed and quality. Continue adjusting until you achieve the desired idle characteristics.
2. Slow (Pilot) Jet – idle to off idle
The slow jet, the pilot jet, is a critical component of a dirt bike carburetor. It controls fuel delivery during idle to off-idle throttle settings. The slow jet regulates fuel flow into the carburetor’s idle and low throttle circuits. The size of the slow jet determines the fuel flow rate. Larger jet sizes allow more fuel to enter the system, resulting in a richer fuel mixture. In contrast, smaller jet sizes restrict fuel flow for a leaner mixture.
The slow jet is not typically adjusted during regular riding or maintenance. However, experience issues such as poor idle quality, rough idling, or hesitation during the transition from idle to off-idle. It may be necessary to clean or replace the slow jet. Adjustments are usually made by changing the jet size to achieve the desired fuel mixture.
3. Needle Clip Position – ¼ to ¾ throttle
The needle clip position is an adjustable component within a dirt bike carburetor that controls the fuel mixture from ¼ to ¾ throttle openings. The needle is a tapered metal rod that slides inside the needle jet. It is attached to a movable clip that can be adjusted to different positions.
By raising or lowering the clip on the needle, the rider can adjust the fuel mixture for optimal performance within the ¼ to ¾ throttle range. Lowering the clip on the needle (moving it towards the top) allows it to sit lower in the needle jet. It results in a richer fuel mixture. It can help address hesitation, flat spots, excessive richness or leanness within the ¼ to ¾ throttle range.
4. Needle Type – ¼ to ¾ throttle
The needle is a tapered metal rod that slides inside the needle jet. It is attached to a movable clip that allows for needle position adjustment.
The needle jet is a metal tube with a precisely sized orifice through which the needle passes. The needle jet’s size and the needle clip’s position determine the fuel mixture delivered during the ¼ to ¾ throttle range.
The needle and needle jet control the fuel mixture during mid-range throttle settings. As the throttle is opened between ¼ to ¾, the needle rises or falls within the needle jet, altering the fuel flow rate. The taper and position of the needle within the needle jet directly affect the fuel-air mixture for optimal engine performance.
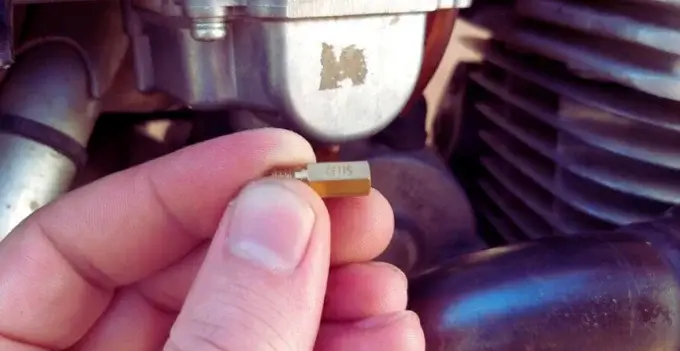
5. Main Jet – ¾ to wide open throttle
The main jet is a component in a dirt bike carburetor that controls fuel delivery from throttle to wide open throttle. It determines the amount of fuel flowing into the carburetor’s main circuit.
Main jet size affects the fuel-air mixture, with larger jets providing a richer mixture and smaller jets providing a leaner mixture. Proper main jet sizing and adjustment are essential for optimal power and performance.
Do You Know?
The typical tightening torque of the main jet is 1.1 ft. lbs (1.5Nm).
6. Leak jet – four-strokes only.
The leak jet is a component found in the carburetors of 4-stroke dirt bikes. It controls fuel leakage from the accelerator pump circuit during rapid throttle openings. Adjusting the leak jet size can fine-tune the amount of fuel leaked. It is specific to four-stroke dirt bikes and not present in two-stroke carburetors.
Pro Tip
Consider a standard jetting chart for two and 4-stroke carburetors that guides the attributes of the pilot screw, slow jet, needle clip position, needle type, and main jet.
Essential Tools and Materials
- Allen wrench set
- Screwdriver
- Carburetor adjustment screwdriver
- sockets
- Pliers
- Shop rags
- Safety glasses
A Complete Guide on How to Adjust a Carburetor on a Dirt Bike
There’re many carburetors, but they all work the same way. First, the fuel and air are mixed in a small chamber, then poured into the engine. It controls the amount of fuel and speed of the mixture entering the engine.
When the carburetor is not properly tuned and adjusted, it may cause engine failure. Many dirt bikers face that problem and search for the answer question of how to adjust a carburetor on a dirt bike. Therefore, we wanted to cover all the basics of adjusting a carburetor on a dirt bike.
Here’s the step-by-step guide for you to make the carburetor adjustment easy:
1. Identify the Adjustments That Your Carburetor Needs
Before adjusting or resetting your dirt bike’s carburetor, you need to identify the adjustments that the carburetor requires. Here is the idle adjustment screw on the side of the carburetor. It’s responsible for controlling the speed of your dirt bike’s engine. Check if your dirt bike is not running smoothly as you like, or if the speed is turbulent, then the idle adjustment screw needs to be nipped.
Test your dirt bike by riding on it. Inspect if it behaves differently from the routine, then go to adjust the carburetor on a dirt bike. You can also take your dirt bike to an experienced mechanic for proper adjustments in the carburetor.
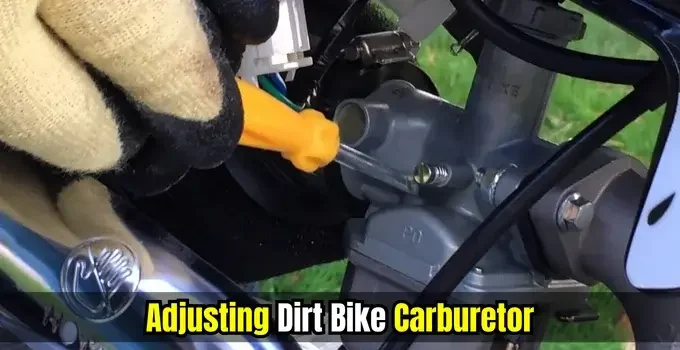
2. Turn the Idle Adjustment Fuel Screw
How to adjust the idle screw on a dirt bike? Before starting any adjustment, you should know what type of screw you need. It may be a Phillips head screw or a Flat head screw for some dirt bikes. Therefore, choose the right screwdriver to adjust a carburetor on a dirt bike.
Once you have the right tools, it’s time to fix it. Now, insert your screwdriver into the hole of the screw. Turn it clockwise or anticlockwise to adjust the idle speed. Turn the screw slowly, counterclockwise and clockwise 1/2 a turn from the middle position to avoid damage to the carburetor.
3. How to Notify if the Idle Speed Is Proper
Are dirt bikes supposed to idle? Yes, all the modern dirt bikes are supposed to idle. But starting an engine in the cold won’t idle with the choke due to the same temperature as the air. Another question may arise in your mind.
Can you let your dirt bike idle for too long? Yes, but not recommended. Because if you let your dirt bike idle for too long, the engine becomes overheated. Then your dirt bike needs to move. A liquid-cooled dirt bike will start leaking coolant out of the overflow hose. It can cause the head pipe to turn red hot.
To adjust the proper idle speed:
- Let the dirt bike engine run for 5 minutes.
- Listen to the engine’s sputtering or coughing if running too slow or fast.
- Adjust the idle screw according to the engine’s fast or slow speed.
- Remember that getting the idle speed right may take a little while. So keep trying!
4. Adjust the Main Jet on the Carburetor
It’s an easy step to adjust the main jet on the carburetor. By turning the main jet screw clockwise, you can increase fuel delivery to the engine. On the other hand, turning it in an anticlockwise direction will reduce the amount of fuel.
After these minor adjustments, start your bike and ride around to ensure the proper adjustments. You’re trying well to adjust a carburetor on a dirt bike.
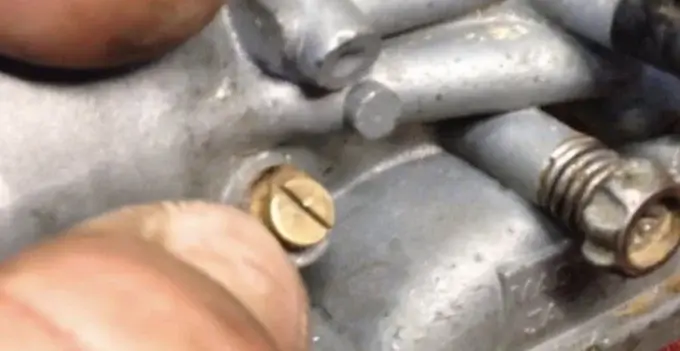
5 .Adjust the Air Screw on the Carburetor
Air screws mix the fuel with considerable air. A clockwise turn of the air screw will add more fuel to run the bike. In contrast, counterclockwise turns add less fuel, and the bike runs leaner. The air screw is located near the air filter. Let the bike’s engine off, turn the air screw 1/4 clockwise and re-tighten it.
Start the bike’s engine to check if it works smoothly. Don’t over-tight the air screw to avoid any difficulty in adjusting later.
6. Test Your Adjustments for Proper Operation
When you’ve adjusted all the parts of the carburetor, then testing those adjustments is essential to ensure the proper work. Take a ride on your dirt bike. If you’ve successfully adjusted your carburetor and the engine is running smoothly. Congratulation! You’re the best man to adjust a carburetor on a dirt bike by yourself.
Following our helping guide and a little practice, you can adjust a carburetor on a dirt bike like a new carburetor.
The Carburetor Maintenance Tips
Here’re some tips on maintaining and tuning your carburetor:
1. Engine Condition:
Before adjusting the carburetor, it’s essential to check the engine condition. Clean the air filters and carburetor properly.
2. Throttle Position:
Keep the throttle position about ⅓ while idling your dirt bike engine. You may adjust the idle screw on the carburetor.
3. Cleaning the Carburetor:
Clean up the carburetor using a brush or scrubber to ensure air intake. You can use water to fast cleanliness from dirt or any debris.
4. Selecting The Right Size Carburetor:
Always choose the right-sized carburetor for your dirt bike to resolve performance issues.
5. Understanding Initial Ignition Timing:
You can understand the ignition timing when the spark plugs fire. It can be observed on the spec sheet of your dirt bike.
6. The Fuel Pressure:
Fuel pressure is another factor when adjusting a dirt bike’s carburetor. It can also be seen on the spec sheet of your dirt bike to check the fuel pressure and type.
7. Float Level:
The float level may need to adjust the height or the position of the float valves.
8. Check for Leaks:
When you end up with all the adjustments in a carburetor, checking for leaks is crucial to avoid any fault or crack.
Additional Tip: If you’re uncomfortable adjusting a carburetor on a dirt bike, take your dirt bike to a professional mechanic.
Conclusion
Now you have the best guide to adjusting a carburetor on a dirt bike. It’s time to do it practically for yourself. You can adjust and tune the dirt bike of your friends by sharing your knowledge in practice, as you know that sharing is caring!
You will be able to run your dirt bike like a new one.
Happy riding!
FAQs
How to adjust the idle screw on a dirt bike?
To adjust the idle screw on a dirt bike, set the idle speed adjusting the screw clockwise to increase rpm and counterclockwise to decrease rpm. The idle RPM range should be 950 to 1050 RPM.
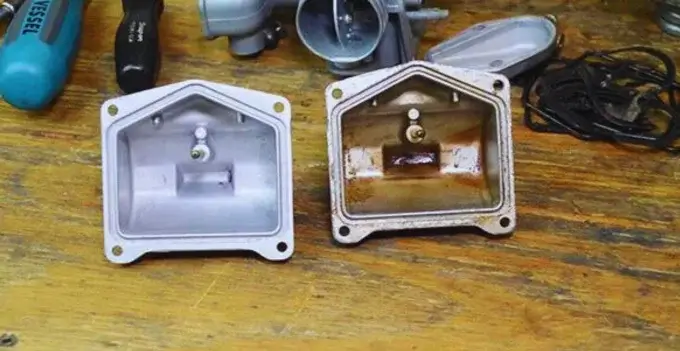
Why does a carburetor have a bowl?
The float bowl holds the fuel, like gasoline, supplied to all the parts of the carburetor and engine.
How do you adjust a 4-stroke carburetor on a dirt bike?
You can adjust a 4-stroke carburetor on a dirt bike with a fuel screw. Reducing the fuel may result in the engine becoming leaner. Turning it out increases the flow of fuel and make it richer.
What should the idle be set at?
The idle screw should be set from the average speed of 600 to 1000 RPMs.
How do you fix a high idle on a dirt bike?
Adjust the idle speed lower through the idle screw by turning it out to fix a high idle on a dirt bike.


