
Helmet on, vision clear, the danger is gone!
Your dirt bike helmet protects your head and vision so you can strike all over muddy terrains. Is your dirt bike helmet dirty after a long motocross racing? Shared you share duties? How do you clean a dirt bike helmet? No worries-you can clean it sparkling like new in an instant!
You’ve spent money on a beautiful dirt bike helmet, the most expensive gear in your bag. The build-up of sweat and oil from your scalp and dirt from air filters makes your Helmet ripe quickly. It can affect the way you ride. All that debris can block the air filter, making breathing harder.
The inside of a dirt bike helmet can also create a foul smell, which doesn’t make for a pleasant ride. When it’s not cleaned after a long day of riding, think of this – you’re putting what amounts of bacteria and mold on your head!
Other than influences, improper maintenance or lack of maintenance is the fastest way to destroy a helmet. In this helping guide, you’ll learn how to clean a dirt bike helmet. How to disinfect a helmet? Some tips for its maintenance and pros and cons of cleaning a dirt bike helmet.
What is a Dirt Bike Helmet?
Do you know about motocross helmets? A dirt bike motocross helmet is a specialized helmet designed to protect riders of off-road dirt bikes. It is a piece of essential safety equipment designed to safeguard the head and reduce the risk of severe injuries during off-road riding activities.
Dirt bike helmets are constructed with a hard outer shell of polycarbonate, fiberglass, or carbon fiber. This shell provides impact resistance and protects the head from direct hits and penetration. Inside the Helmet is a foam liner, typically made of expanded polystyrene (EPS), which minimizes the risk of head trauma.
They usually have a distinct chin bar, extended visor, and larger eye port for enhanced peripheral vision. The chin bar provides additional protection for the lower face and jaw, while the visor helps shield the rider’s eyes from the sun, branches, and debris. The larger eye port allows goggles to prevent dust, dirt, and rocks from entering the eyes.
They typically have multiple vents and exhaust ports to promote air circulation and heat dissipation. Remember, wearing a dirt bike helmet is essential for protecting your head and reducing the risk of severe injuries while riding off-road motorcycles.
Protect your head; see your path!
Dirt Bike Helmet vs. Motorcycle Helmet
You need a helmet if you enjoy the open roads on a motorcycle or explore dirt tracks as a motocross rider. There’re differences between a motocross helmet and a motorcycle helmet. Though each is designed to protect you as a rider, knowing each Helmet’s features will help you find the best Helmet for your preferred ride.
Both dirt bike or motocross and motorcycle helmets will keep you safe during fun riding. Here’s a comparison between dirt bike helmets and motorcycle helmets:
| Dirt Bike Helmets for Rugged Riding | Motorcycle Helmets for Street Riding |
|---|---|
| Designed for off-road riding activities, such as dirt biking, motocross, enduro, or trail riding. | Designed for on-road riding activities, like street riding, touring, or commuting. |
| Protects with a hard shell, cheek pads, and foam liner. | Protects with a hard shell and foam liner. |
| Typically, larger eye port goggles are for eye protection and debris prevention. | Usually has a smaller eye port without accommodations for goggles, designed for use with a visor or face shield. |
| Emphasizes enhanced airflow and ventilation due to the physically demanding nature of off-road riding. | Prioritizes aerodynamics and noise reduction for comfortable on-road riding at higher speeds. |
| It may have more aggressive and vibrant graphics and designs. | Styling varies, with various designs from simple and understated to sporty and bold. |
| Chin bar provides added facial protection. | Chin bar provides added facial protection. |
| Suitable for various off-road riding styles and environments. | Primarily suited for on-road riding and legal street use |
| It may not be street legal | It must meet DOT standards. |
Dirt bikes and motorcycle helmets share similarities in the safety and protection of both riders.
- Both provide impact protection for the rider’s head.
- Both comprise a chin bar for added facial protection.
- Both helmets are subjected to safety standards and certifications.
- Both feature a strap and buckle system for secure fitting.
- Both have an inner foam liner to absorb and disperse impact force.
Best Choice
The dual sport helmet may be a solution for those dabbling between on and off-road riding.
Why Do You Keep Dirt Bike Helmets Clean?
Dirt bike life is rough and tough but with a lot of fun. From street bikes to off-road all-terrains dirt bikes, helmets are subject to getting dirty, right? Well, it’s your conditions and choices. Cleaning your dirt bike after a long heavy ride is most important. On the other hand, most riders want to get their dirt bike clean, but the rest of the gear, like helmets, boots, and waterproof suits, is thrown in the laundry.
It could be a better idea! Don’t clean the Helmet with a heavy wash. It may degrade the fabric and deform the inside foam padding. If your dirt bike takes a regular beating on each ride, keep it clean and well-maintained.
Here’s why:
1. Identify Noticeable Defects
When you clean a dirt bike helmet, it’s time to give a close once-over to any scratches, marks, or dents. These defects look minor as they don’t affect the helmet functions. On the other hand, long-term wear and tear tells you to buy a new helmet. Ensure the inner linings are in good condition, not torn or ripped.
2. Good Appearance
A well-maintained and clean helmet reflects professionalism and care for safety. It also helps you take pride in your gear and appearance as a rider.
Dirt and mud are like battle wounds for dirt bike riders, but a clean, fresh helmet gives them confidence. Therefore, renew its shine with a simple cleaning process after each ride. Once a month is best for cleaning your Helmet.
With continuous cleaning, I wear my Helmet with pride!
3. Maintenance Promotes Safety
Cleaning your motocross helmet allows you to inspect it for any signs of damage. Regularly checking the Helmet’s integrity, such as the shell, visor, chin strap, and ventilation system, allows you to identify any issues promptly.
Like your dirt bike, you must maintain a helmet if you ought to last for a long time. The dirt or debris can get stuck in visors, making them cause disturbances in riding. Cleaning your Helmet ensures it stays in good working order.
4. Dirt Bike Helmet Longevity
Do you want to increase your dirt bike helmet’s lifespan? Cleaning your dirt bike helmet preserves its quality and lifespan. Dust, dirt, and grime can gradually deteriorate the materials, such as the foam liner and straps, compromising their effectiveness. Keeping the Helmet clean can help to perform optimally for a longer period.
5. Optimal Visibility
A clean helmet guarantees optimal visibility for the rider. Dirt, mud, and debris can accumulate on the visor, blocking the rider’s view and potentially causing accidents. Regular cleaning ensures clear vision and enhances safety.
Get a clear vision, and stay alive!
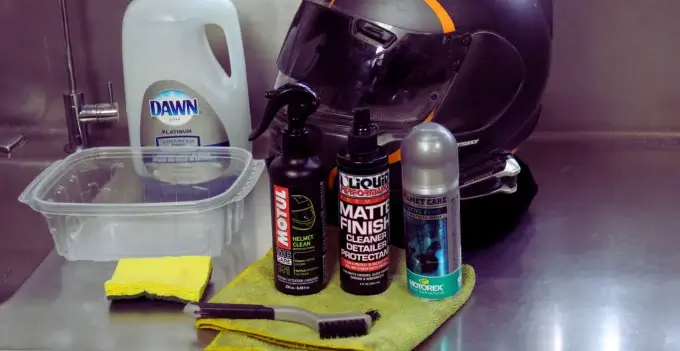
Helmet Washing and Cleaning Tools & Accessories
Unlike your expensive motocross dirt bike, helmet cleaning materials cost negligible because all the materials needed will be at your home.
Now after knowing why you must clean your motorcycle or dirt bike helmet, let’s get down to the instructions! It’s time to collect all the necessary materials to clean and polish your Helmet’s interior and exterior. So, get your supplies together:
- Microfiber rag / soft cloth
- A toothbrush / soft-bristled brush
- Mild shampoo or helmet cleaner
- Warm water
- Air compressor (if you have one)
- Drying rack/stand
- Polish
- A helmet bag or storage case
- Goggle cleaning kit (optional but beneficial)
How to Clean a Dirt Bike Helmet? Step-by-Step Guide
Clean your dirt bike helmet before and after every ride. Now that you’ve collected all your materials and found a suitable workspace, it’s time to start.
Step 1- Remove All Electronics
Firstly, withdraw any electronics from your dirt bike helmet. If you’ve any electronic equipment GoPro, comms systems, etc., like antennas, microphones, batteries, or Bluetooth devices, now is the time to remove them. Please do so to avoid damage to your valuable electronic equipment.
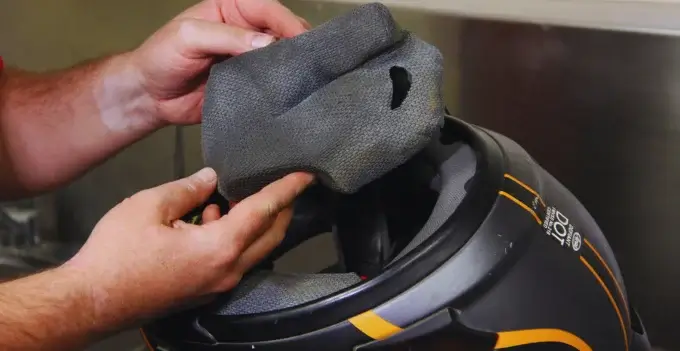
Step 2- Remove the Inner Liner
Next, you need to remove the interior liner and cheek pads. All motorcycle and dirt bike helmets are designed differently, but most liners have a gentle yet firm tug. If your Helmet has removable parts like the visor, peak, or liners, carefully detach them according to the manufacturer’s instructions. It will allow you to clean each component thoroughly.
The helmet liners are delicate and can easily be torn if pulled with a jerk. Therefore, try to separate them from the edges of the EPS liner. The inner liner is there for your protection and comfort, so avoid using excessive force.
Step 3- Prepare and Clean the Outer Shell
Have you seen the outer shell as the dirtiest part of your Helmet? After a long dirt bike ride, you’re caked with mud from Helmet to boots. The dirtiest part of your Helmet will be the outer shell because it is exposed exterior to muddy or wet weather conditions.
Now, soak your microfiber towel in warm water to remove dirt or debris from the Helmet’s surface. It prevents scratching the face shield or shell during cleaning. Put some detergent in the water and use a spare cloth or sponge to scrub the remaining dirt. You can also use helmet spray made from specialized cleaning agents with active ingredients.
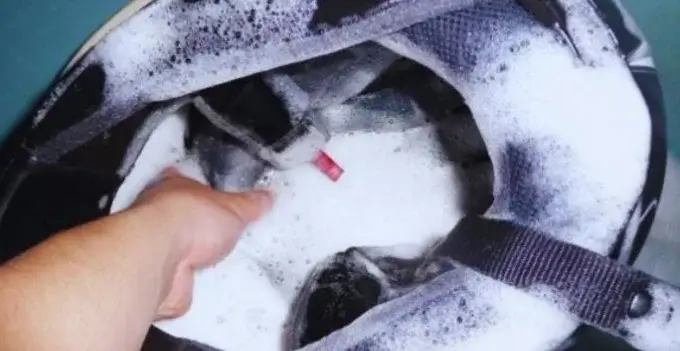
Step 4- Clean the Interior
Even though the outside of your Helmet is what’s seen the most, the inside needs the deepest cleaning. The inner pads absorb sweat, oils, and dirt, especially on those long, hot rides.
Start by filling a small sink or bucket with warm water and mild soap. Baby shampoo works best designed to wash away hair oils and sweat.
Dip each piece of the liner into the water, scrubbing and rubbing it with your hands. Once you’ve scrubbed each part, rinse them off, and set it out to air dry.
Keep the back dry; a wet helmet liner will smell poorly.
Step 5- Wash the Exterior of the Helmet
Remove the wet cloth you’ve put on the Helmet’s outer shell. Use a soft cloth or microfiber towel dampened with a mild baby shampoo and warm water to wipe down the Helmet’s exterior. Pay attention to areas that are visibly dirty or have accumulated grime. Avoid using cutting tools that may scratch the Helmet’s surface.
Try using a soft bristle brush to clean the hard-to-reach areas. Take off the visor or face shield that is cleaned separately.
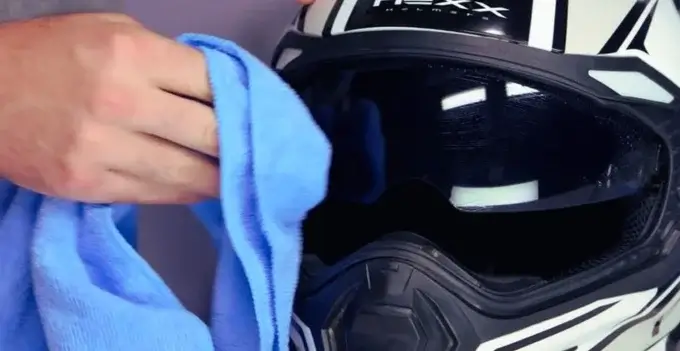
Step 6- Clean the Face Shield
Many face shields have a coating or UV-protective layer, so warm water is best for cleaning these parts of the Helmet (not soap).
Use a microfiber cloth to remove smudges, dirt, or markings from the face shield. Leave a warm, wet microfiber on the shield for several minutes to remove any stuck-on dirt particles.
Step 8- Dry the Helmet.
Allow all helmet components to air dry completely after cleaning. Use a helmet stand or drying rack to ensure proper ventilation and maintain the Helmet’s shape. You can also use an air compressor to clean any dirt from the vents to ensure adequate airflow.
Additional Tip: Clean your dirt bike helmet the day before to allow sufficient time to dry before your next ride.
Step 7- Reassemble Your Helmet
Once everything is dry, reattach the detachable parts, such as the face shield, visor, cheek pads, Bluetooth system, your GoPro or action camera, and anything else you removed, according to the manufacturer’s instructions. Reassemble your Helmet, starting with the dry liner and cheek pads. Before assembling, Ensure everything is clean, wiped down, and dry.
Step 9- Wax and Protection
You can use a special high-quality polish or wax to seal before or after assembling the parts of the helmets. It will also protect the Helmet from additional wear and tear and make cleaning easier. Use wax to protect any graphics or vinyl decals attached to your Helmet. It’s the best way to preserve the color and design so you can show off your style for years.
Therefore wax your Helmet for extra protection and shine. The wax or other protectants will make it easier to clean your Helmet next time. Manufacturers advise riders to replace their helmets after a crash.
Cleaning your Helmet will expand its lifespan. The more you keep up with the “upkeep,” the better the Helmet will operate and live longer.
Do you know?
Natural Carnauba Wax and Turtle Wax are the best for dirt bikes or motorcycle helmets.
Step 10- Storing Your Helmet
When the Helmet is clean and dry, you should store the Helmet out of the gear bag or somewhere dry and well-ventilated rather than in a damp shade. Store it in a storage rack or free-standing shelf to protect it from dirt and debris till the next ride. Storing your Helmet is the best idea to keep it smelling fresh for your next ride.
How To Clean The Dirt Bike Helmet Pads?
Is cleaning dirty helmets a dirty job? Many variables go into dirt bike ownership, from maintaining your bike to safe riding. So cleaning your Helmet is as important as a dirt bike. Therefore, cleaning a dirt and muddy Helmet is not a dirty job.
I recommend washing your helmet pads with mild soap or baby shampoo in cold water. But it would help if you took care when put into a washing machine according to the manufacturer’s advice. Hand washing is best for washing delicate fabric pads. Never put the helmet pads in the dryer! Air dry them.
How To Clean The Interior Inside Of A Dirt Bike Helmet?
You can also put the inner side of your Helmet and the cloth part that sucks up your sweat and oil in the laundry. However, washing by hand or a gentle warm cycle wash is the best way to clean the Helmet’s inside. The heavy wash may deform the foam padding or fabric.
Here’re the steps to clean the inside of a dirt bike helmet:
- First, remove the cheek pads and liner from the Helmet.
- Check the Helmet’s manual to see if the pads and liner are machine-washable. If they are, you can wash them in a gentle cycle with mild detergent. You can hand wash them in a sink or tub with warm water and mild detergent if they are not machine-washable.
- Rinse the pads and liner thoroughly with warm water.
- Allow the pads and liner to air dry completely.
- Wipe down the inside of the Helmet with a wet cloth.
- Allow the Helmet to air dry completely.
Additional Tip
Dr. Bronner’s is a mild soap that effectively eliminates odors and is for people whose helmets tend to have a sour, unpleasant smell.
Pros and Cons of Motocross Helmet Care
Motocross helmet care and cleaning needs a lot of consideration, from removing inside parts to drying and storing the Helmet. Therefore, before cleaning, you need to know its benefits and drawbacks. Some pros and cons of motocross helmet care are demonstrated below:
Pros
- Regular care and maintenance of a motocross helmet ensure optimal protection.
- Cleaning the inside of the Helmet helps maintain hygiene by removing sweat, dirt, and bacteria that can accumulate over time.
- Washing the interior padding allows for proper airflow, keeping you cool and comfortable.
- Keeping the Helmet clean and well-maintained can extend the lifespan of a motocross helmet.
- Proper care can also help to keep the Helmet’s foam in good condition.
Cons
- Properly caring for a motocross helmet can be time-consuming.
- Thoroughly cleaning all components can be labor-intensive.
- Although rare, there is a slight risk of damaging the Helmet during cleaning or maintenance.
- Good helmet care may involve buying cleaning products or replacement parts, which may be costly.
What Is The Lifespan Of A Dirt Bike Helmet?
Helmets have an expiry date like other items. The lifespan of a dirt bike helmet is typically around 3 to 5 years. Quality, usage, care, and any impacts can affect its longevity. It’s important to inspect for wear and tear regularly.
You’re recommended to replace immediately after a significant impact. You’ll generally use your Helmet for seven years if well maintained regularly.
If you have had a crash and hit your head hard enough, that is a good indication that it’s time for a new helmet. All the stuff used in making up Helmets becomes brittle with time. So you should replace the Helmet after the suggested date even if it has no impact or crash.
All the helmets have an MFG sticker that tells you about the Helmet’s age.
Conclusion
Cleaning your dirt bike helmet regularly is an important responsibility. A dirty helmet can affect the air you breathe and make it harder to ride the trail. It would be best if you never rode with a dirty helmet. It’ll make the ride uncomfortable and put you at a safety risk.
Follow our guidelines about cleaning a dirt bike helmet for ease and comfort. These suggestions will increase your great-looking Helmet’s age by even eight years. Keep supporting your health as well as your ride!
Have a pleasant next ride!
FAQs
How much time is required to clean a dirt bike helmet?
The time required to clean a dirt bike helmet can vary depending on how dirty the Helmet is and how much time you have. Generally, thoroughly cleaning a dirt bike helmet can take approximately 30 minutes to an hour.
How long can a dirt bike helmet good be used without washing it?
A dirt bike helmet should be washed after a few rides. The sweat and dirt that builds up inside the Helmet can have bacteria and mold, which can cause suffocation, skin, and other health issues. Ideally, you must deep clean your dirt bike helmets every 2 to 3 months.
What should I be careful of when cleaning my Helmet?
When cleaning your Helmet, there’re several precautions to keep in mind. Here’re some things to be careful of when cleaning your Helmet:
- Do not use harsh chemicals, solvents, or abrasive cleaners.
- Do not use a hair dryer.
- Do not soak the Helmet for an extended period.
- Do not dry the Helmet in direct sunlight.
- Do not use a brush to clean the Helmet’s shell.


")

